WEFT TWINING: THE LEARNING PROCESS.
It has been a long time since I have learned something fiber related that it is completely new to me. As fun and interesting as it is, it has reminded me of just how much time is involved in practicing something so you can get to the stage where you are making something even half decent.
It is great finding weavings from different cultures online, finding that I know the technique and being able to chart and weave it like the Tarahumara band that I wove last week. When I visited the Montagnard weavers I saw a variation of a pick up technique that I already knew so it was not difficult to come home and weave it.
 However, I also saw that the Vietnamese ladies were working with weft twining, something that I had not tried nor seen worked before. Unfortunately I didn’t get to see the process and so I needed to come home and dive into my books in order to learn something about it.
This is a technique that has interested me for a long time. I bought Cheryl Samuel’s gorgeous book on weft twined Chilkat blankets from that wonderful newspaper-like catalog that Unicorn books used to put out back in the 90s. It is a stunning piece of work with beautiful illustrations – a joy to look at even if you don’t actually use it to make anything. Making a Chilkat blanket was perhaps a little daunting and so later I got a book on the Taaniko weft twining practiced by the Maori people of New Zealand. This seemed a lot more manageable. The book has fabulously clear step-by-step drawings but the disappointing lack of a variety of traditional Maori designs left me uninspired to try the technique.
More recently, my friend Caroline in Australia sent me a monograph on weft twining by Virginia Harvey and Harriet Tidball which has proved to be very useful.
Seeing the fine designs worked by the Montagnard weavers into the edges of their woven blankets and shirts was the motivation I needed to finally get down and learn how to do weft twining. Being able to touch the textiles and meet the weavers made all the difference.

Susan Stem shared the image above left with me of a loin cloth with a red and white weft twined edge. The other two examples were made by Montagnard weaver Nach Rahlan.
 I remember being amazed when Betsy Renfrew, who is working with the Montagnard weavers, told me that this weft twining called kteh is worked off the loom. However, after reading my books and searching online, I have found that this is more often the case than not. Now that I have tried the technique myself, I don’t see any need to have the warps stretched out taut and can just hold everything in my lap. Maori weavers apparently have the top of the piece stretched out between two vertical stakes with the warps hanging down loosely.
And how is this for wonderful timing… the book you see at left, which I had ordered online and which has information about weft twining, arrived today. I can’t wait to get into this! Author Joy Totah Hilden has a wonderful website on Beduin weaving (she chooses to use that spelling) with seven pages devoted to weft twining which include images and instructional diagrams on the technique. The roll of cotton string which you see on top of the book is what I used for my warp and the yellow ball is Sugar and Cream cotton which served as my weft.
In her book Joy Totah Hilden describes weft twining as “the oldest weaving technique known in the world”. She quotes Mary Atwater who says “Twined weaving is so ancient that it may be said to have no history”. There is a discussion in a forum online about whether it is , in fact, classified as weaving. In any case, the results are beautiful!
So after a considerable amount of reading and trying to visualize the process, I got my materials together and started. This is one of the lowest tech techniques ever! That roll of string, the ball of yarn and my hands is all that I needed…no needles, pins, stakes or hooks. Okay, you do need one more thing in abundance: patience, as this is a slow technique.
I would liken it to learning to knit or crochet. The basic moves are not difficult but you have to figure out how you are going to hold and tension everything and you need to practice it a lot to get into a rhythm and settle into your own personal tension. You are all thumbs at first, tension is all over the place and the results are not too pretty! Basically you are taking two wefts, generally in two different colors, from one edge of the warp to the other twisting them as you go so that they encircle each warp.The twist is single or double depending on which color you need on the upper surface of the piece to form the pattern.

Working without a loom, the loose warps are controlled and held under tension by the left hand while the right hand twists the wefts.
I soon got bored with my first red and black piece with a small design from the Taaniko book. What I really wanted to make were some of the Montagnard designs. The good thing is that the designs are really easy to chart on basic squared paper. You can see the great variation in tension between the two red and white samples above as I slowly got used to doing the twining and settled into a consistent rhythm and tension.
 The Taaniko book teaches you to first twine from left to right one row at a time tying off the yarn once the right hand edge is reached and then beginning again from the left side. This results in a series of knots down the right edge. This has you twisting the yarn with your right hand while holding the warps with the left. The idea is to eventually become ambidextrous in order to be able to reach the right edge, turn, and go back in the other direction twisting instead with the left hand.
Well I am sorry to say that I simply don’t have the patience for this part of the learning process and so I just flip the work over and return with the back side facing me twisting with my right hand all the way. You soon learn how to read the pattern equally well from the back side (this is a single faced technique).
As you can see above, the resulting “stitches” are slanted which means that diagonal lines in the design take on a different appearance depending on which way they are slanting. I thought at first that I must be doing something wrong but a close inspection of the Montagnard pieces showed that their designs have exactly the same appearance.
Getting increasingly adventurous I created a wider warp and charted one of the motifs from the photo that Susan Stem had given me. This is not a completely faithful reproduction as I could not see the details well enough in the picture. I chose some small border motifs from the Montagnard pieces, a Maori border and another main Montagnard motif and lumped them all together in the one piece.
Ideally, you would work with weft long enough to twine back and forward and finish the whole piece but this length of warp would be very difficult to handle. You eventually have to finish at one edge and knot the wefts there, take more weft and start again.
Now what to do with all those knots and tails? From what I have read, it is common practice to cover the knobbly knotted edges with braid or add a fringe or tassels along the entire edge. In the picture below, I added a fringe along one edge to see how that looked.
That doesn’t look too bad although you can see that the edge in general needs a lot of improvement. What I might do for the next piece is add a Navajo-style twining down the side.
My first weaving experience was with Navajo-style tapestry and this is one of my early pieces. I always loved the way this twining looked on the sides. I would like to see if this helps smooth out some of the lumps and bumps in the edges of my weft twined work.
So now I have an even better appreciation of the work that the Montagnard weavers are doing creating the weft twined edges on their weavings. Of course they are working with much much finer yarns and their warp is the fringe of their woven piece. They use several strands of their fine warp yarn as one warp for the twining.
Maybe I will get down to finer yarns eventually but for now I am content to continue with the chunky stuff and I would like to make some of the designs from my new book. I love the colors of these pieces..all those sun faded reds, blues and mustard yellows that work so well together. Now to start planning a piece that can be made into something useful. The result is very sturdy and would actually make a brilliant backstrap, belt or bookbag.
 That was my week of practical work and then there was the charting. I have plans to reproduce the Huichol piece at left that I photographed at the National Museum of the American Indian. It has been woven in balanced double weave.
I have woven this technique only once before from a ready made chart but I don’t have enough experience with the structure to be able to chart it directly from a textile so there will be a lot of experimenting and sampling before this project gets off the ground.
Actually there are some charts in an old issue of Prairie Weave Companion which I should probably weave first to get my hand back in. One of the charts is of a Chinese lattice work design – gorgeous!
As usual I will leave you with some work done by members of the online backstrap groups on Weavolution and Ravelry.
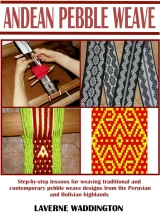
Kimberly, whom I met at Convergence, has taken to Andean pebble weave in a big way following my book…
The band on the left is made with size 3 crochet cotton and the one on the right size 10 – Coats Royale – beautiful rich colors.
Carinefile in Belgium made a backstrap following my article in WeaveZine and Evelyn has been pebble weaving.
I see many more days of weft twining and charting Middle Eastern designs coming up hopefully with improvements in my technique. If all goes well, I will have a balanced double weave project underway too and there is a supplementary weft piece taking shape in my mind after having seen a yurt band online. Oh and there’s another Tarahumara piece that I would love to tackle….!






you should meet Martha Stanley, can’t wait for you to see her work….
By: yonat michaelov on September 24, 2010
at 6:34 am
Hi Yonat,
Is there anywhere to see her work online in the meantime?
By: lavernewaddington on September 24, 2010
at 12:20 pm
Laverne ,
I am in Belgium, it is nice to put my work on your site.
Like so much else that I have a plain weave on the road.
Thank you for what you share
carine
By: carine on September 24, 2010
at 8:19 am
Oops! Changed it to Belgium! Sorry, Carine.
By: lavernewaddington on September 24, 2010
at 12:20 pm
It is so fun to see everyone’s work! BEAUTIFUL! I have been looking around your site and I want to try the warp float technique, but trying to hold off until I get some holiday gifts made using pebble weave.
Thank you Laverne for you inspiration!
By: Kimberley on September 24, 2010
at 1:14 pm
You will love the warp float technique! Can’t wait to see the pebble weave gifts you make.
By: lavernewaddington on September 24, 2010
at 1:49 pm
Tu blog nunca deja de sorprenderme y maravillarme. ¡Qué fotos más hermosas publicás!
Saludos desde Argentina
By: Luchi on September 24, 2010
at 1:36 pm
LAVERNE, me parece tan interesante tu interés en tan diversas técnicas, yo he tenido la suerte de estudiar también muchas de las técnicas presentes en los tejidos precolombinos y etnográficos, pero me encanta que tu hagas la relación con tejidos europeos o asiáticos. Gracias por esto, y por compartirlo.
Saludos desde Santiago de Chile.
CECILIA
By: CECILIA on September 24, 2010
at 4:40 pm
laverne es increible todas las maravillas de tjer en TELAR y tu forma de explicar y mostrar cada trabajo cada ves me fascina ,MAS ESTE ARTE DE TELAR.SALUDOS DESDE CHILE
By: HERMINDA on October 3, 2010
at 10:06 pm
[…] learned a twining technique from books on Maori Taaniko..You can read more about this here and […]
By: Backstrap Weaving – Weft twining with the Montagnard backstrap weavers. « Backstrap Weaving on November 26, 2010
at 2:02 am